The rear axle on a Quadrasteer equiped vehicle is a Dana 60. It is a pretty common unit that was used on the front of many 1 ton trucks in the 70s, 80s and 90s, and some muscle cars in the 60s and 70s. Even though this is on the rear of my pickup, most of the parts and procedures are similar to a front axle, since the wheels steer. (only move maximum of 15 degrees, instead of normal 40 degrees) These are the steps I took to remove and replace the carrier, ring, and pinion. I’ve included the recommended tightening specs for reference during assembly.
Remove the wheels.
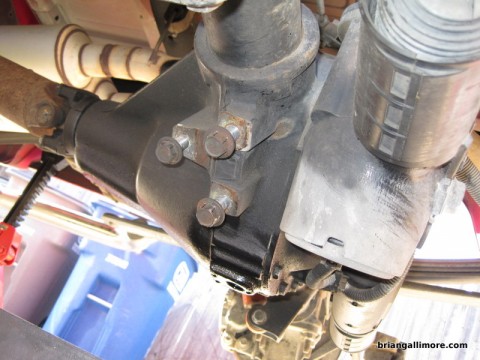
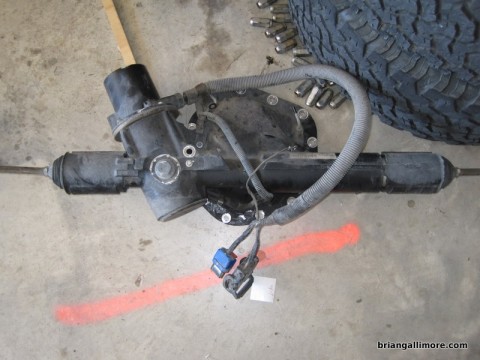
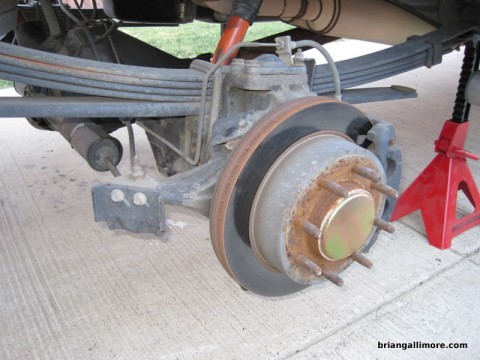 The rear-steer action is accomplished with a electric servo motor, gear box, and tie-rods. It is mounted to a special differential cover housing. I think all of the internal parts are the industry-standard Dana 60 parts, which is a really good thing because there are so many different parts and options available for it.
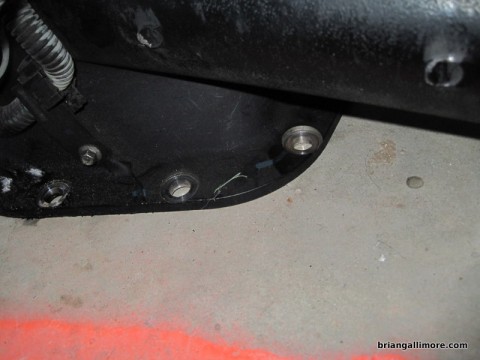
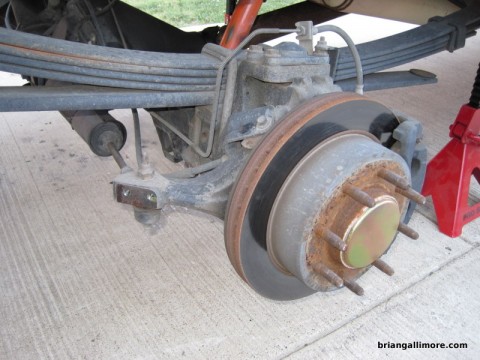 Remove two bolts and the tie-rod protection plate. (48 lb-ft)
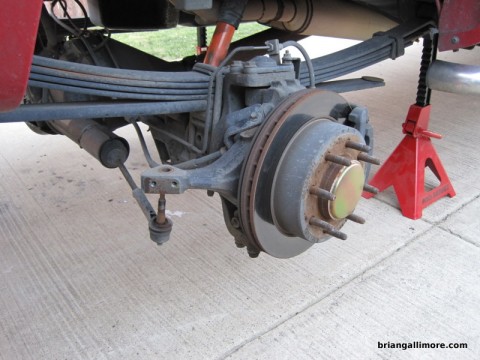 Remove the tie rod end nut and beat the tie rod out of the hole. (40 lb-ft)
Remove differential drain plug and drain the oil.
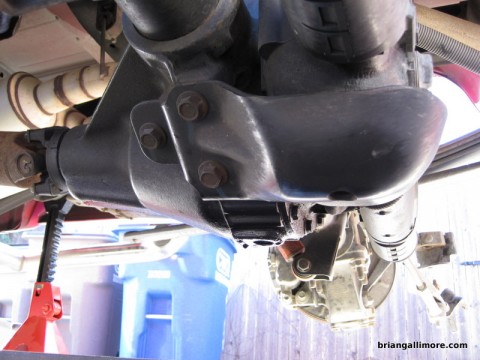 Remove three bolts and steering gear protection shield. My impact wrench didn’t have enough oomph to get these out. I had to use a big breaker bar. (132 ft-lb)
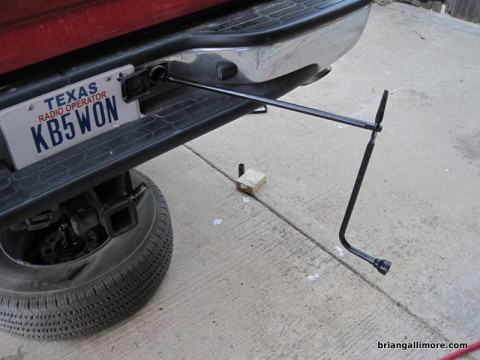 Remove spare tire to gain access to the quadrasteer control box.
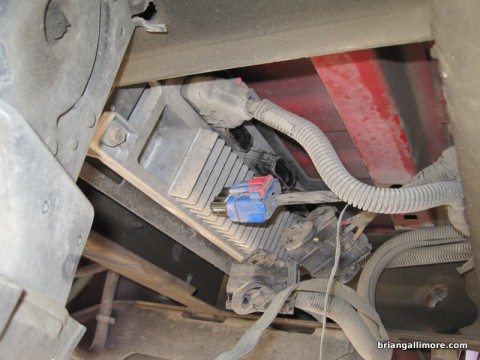 Disconnect the middle two electrical connectors from control module.
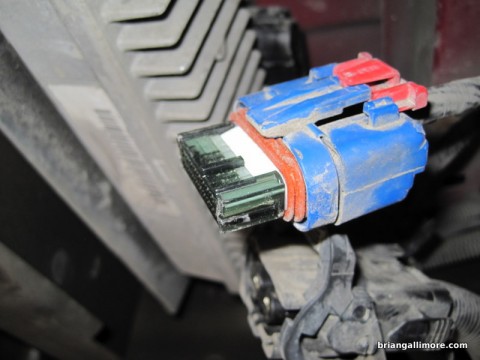 The smaller one has a red clip that has to be removed first, then squeeze where the clip was at and pull the connector out.
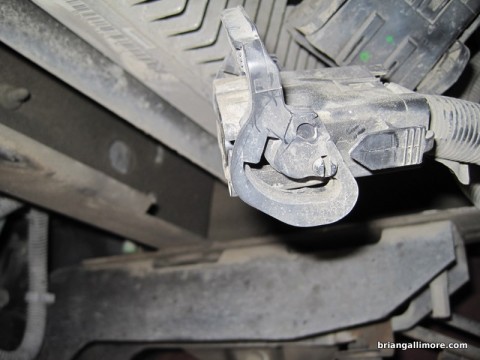 The big connector has two tabs that are squeezed inward, then the latch is raised, which pushes the connector out.
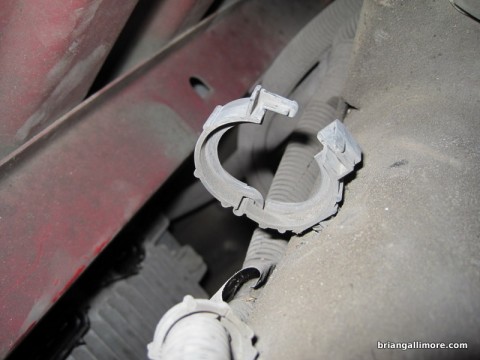 Another example of car manufacturers placing ease of assembly ahead of ease of service. This clip is mounted above a frame cross-member. There is no way to see how to unlatch it.
Disconnect differential vent hose.
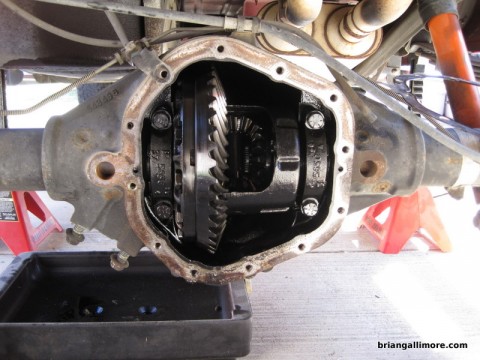
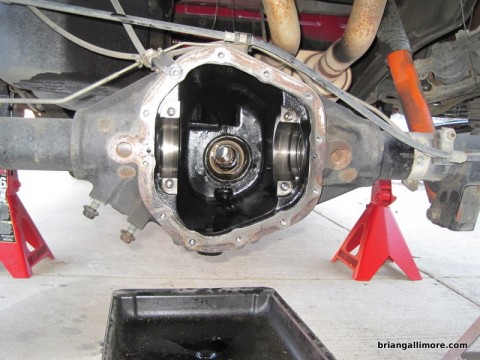
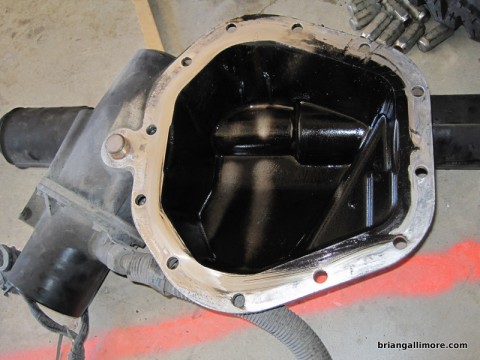 Remove differential cover / steering gear actuator.
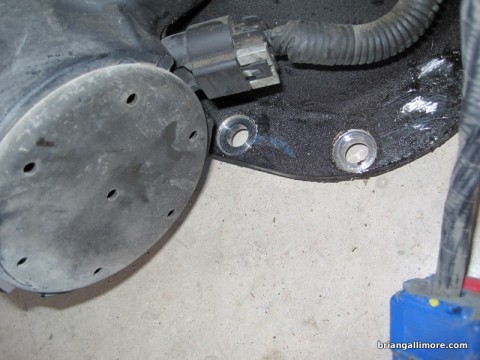 There are two bolts that I couldn’t get a socket or impact on, had to use a wrench. Don’t use gear wrench to get the one out behind the gearbox because you will find yourself having the wrench and bolt both stuck. I learned this the hard way!
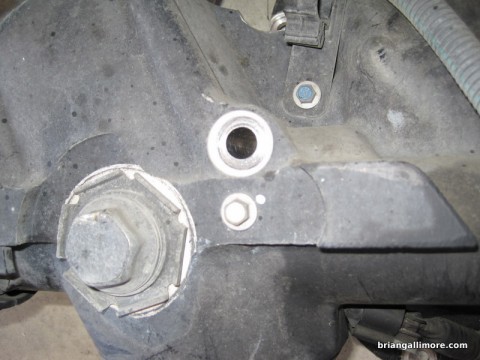 There is one long bolt that is not obvious that it bolts into the differential housing. There is also a big dowel machined into the differential cover / gear housing with a corresponding hole in the differential housing. This prevents the whole thing from falling on you when you get the bolt out. (45 lb-ft)
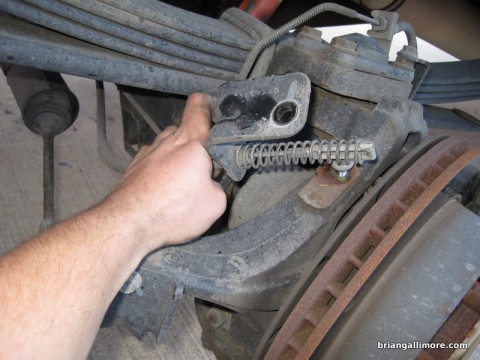 Remove parking brake cable. It seemed to work best when I used one screwdriver to relieve pressure from the spring, and another screwdriver and hammer to move the cable end from the lever. It is probably easier to just to disconnect the parking brake cable from the left side of the left frame rail. I had to disconnect it to re-install the connections at each wheel.
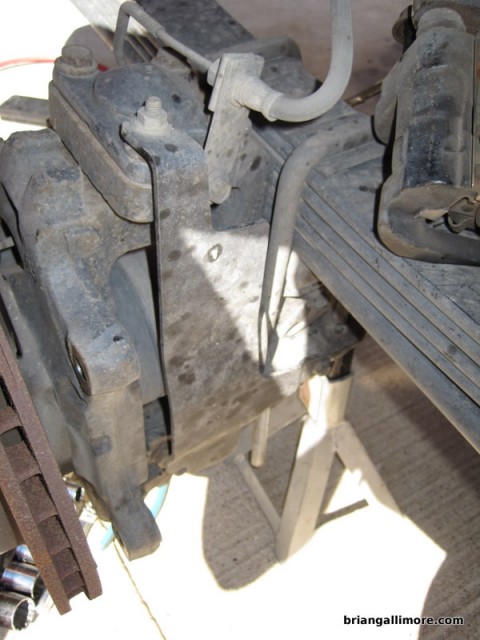 Remove the quarter shaft shield (18 lb-ft)
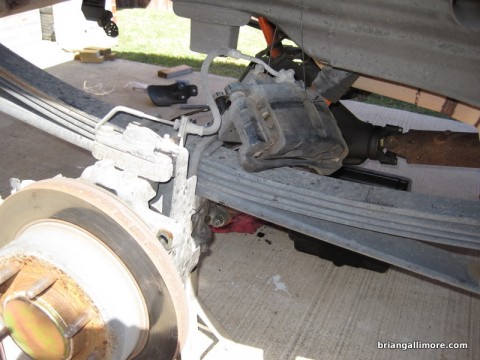 Remove the brake caliper. Push the piston in a bit with a c-clamp to give yourself some room if you need it (I didn’t). These bolts were a bear to get out. Support the caliper with wire to protect the brake hose. (148 lb-ft w/ threadlock)
Remove the brake rotor. (Mark orientation. Clean mating surface before reassembly) [this step is from the service manual, I didn’t do it – see below]
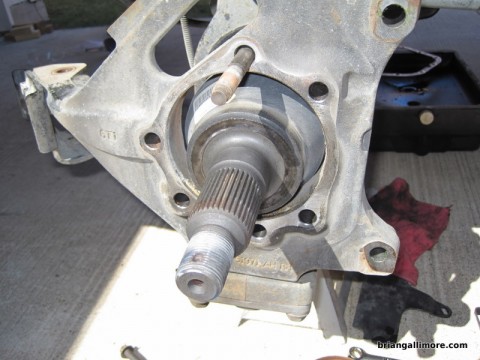 Remove cotter pin, retainer, and nut from wheel drive shaft with 33mm socket. (184 lb-ft)
Remove wheel hub and bearing retaining bolts. These bolts are under the brake rotor, which I never separated from the hub. Separate the wheel drive shaft from the wheel hub and bearing. (132 lb-ft) [this step is from the service manual, I didn’t do it this way]
Remove upper ball joint [this step is from the service manual, I didn’t do it this way]
Remove lower ball joint [this step is from the service manual, I didn’t do it this way]
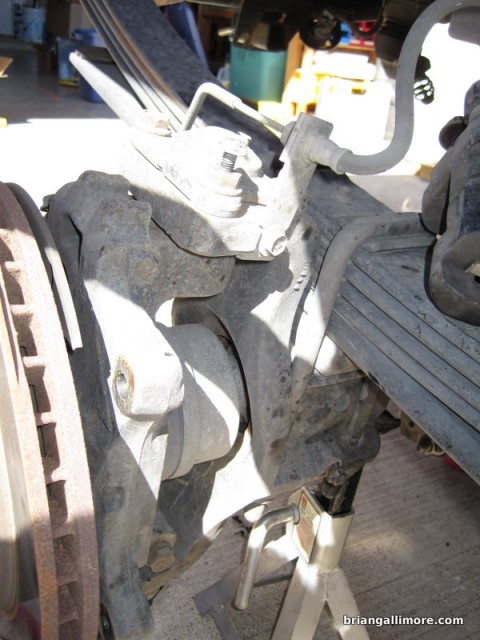
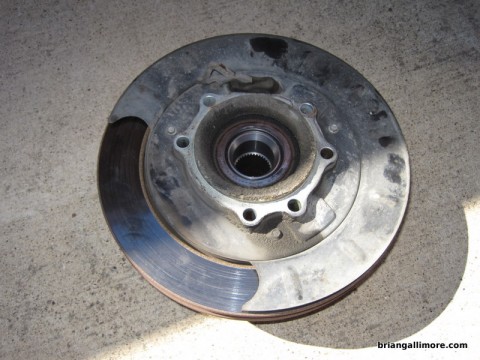 There are 6 bolts that hold the wheel hub and bearing to the outer steering knuckle. The bolts are a pain to get to, but you can get them all out with a box end wrench. If you remove these bolts, you can remove the hub, bearing, rotor, and axle out all as one unit. Doing this saves you from having to remove or re-torque the axle end nut, and saves you from having to disassemble the upper and lower ball joints. If you choose to take out the axle and assembly out all at once, I recommend you have a helper. It is awkward/impossible to gracefully pull it all out and support it correctly with just two hands. [just go ahead and take the hub off, because you can’t really install the axle shaft back into the housing with the hub installed– you need to hit the shaft to seat it all the way into the carrier]
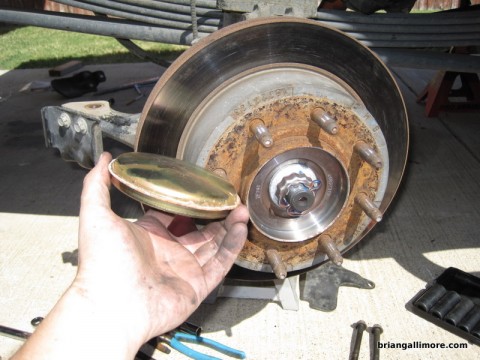
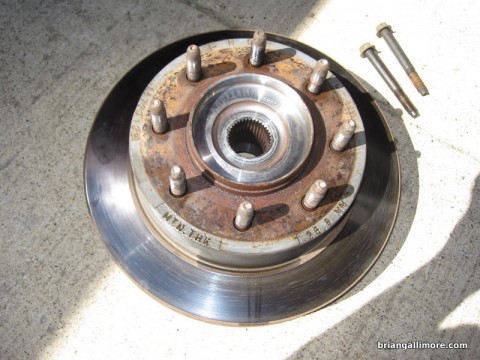 This is the hub, bearing, and rotor removed from the axle shaft.
 Remove the c-clips holding the axle shaft at the carrier. This was easy to do with two screwdrivers. You can spin the c-clip around until you have it orientated with the gap facing you, then press each end away from you. It will shoot off and you can retrieve the clip from the bottom of the differential housing.
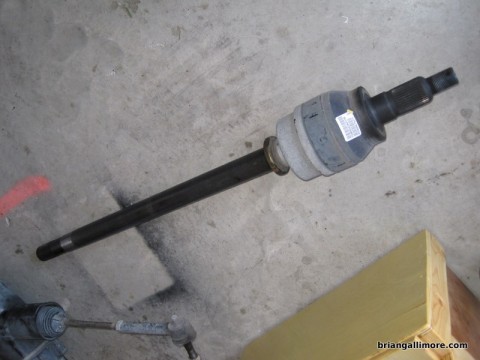 Now you can play tug-o-war and pull the shaft out. The service manual says to use an axle puller / slide hammer tool, but I didn’t need to use one. The joint on these axles is some sort of CV joint, instead of the standard u-joint used on most Dana 60 units.
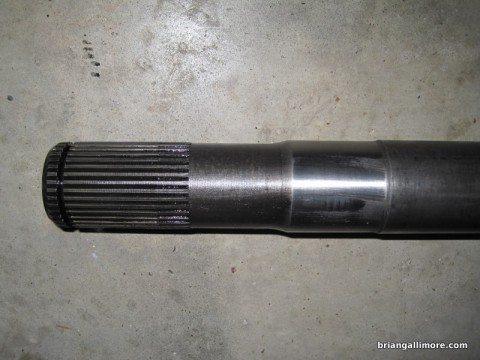 The axle shaft seems to be the standard Dana part. It is the large 35-spline variety. Measures 1.50″ at the splines, 1.56″ at the seal area, and 1.6″ for the rest of the length. It is impressive and heavy.
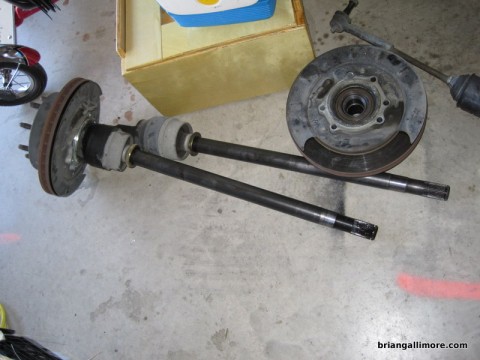 Both axle shafts shown here. I removed one of the shafts with the hub and rotor still attached. It doesn’t save you any time, because I wound up having to remove the hub during installation. (have to hammer the shafts back in, no surface to beat on with hub and rotor in place)
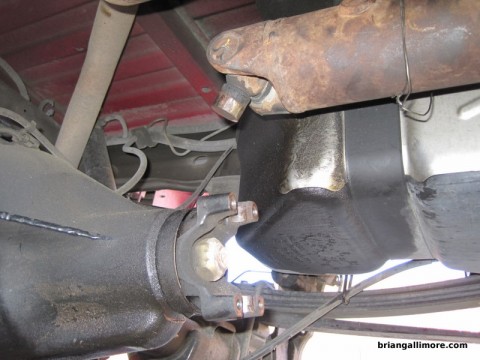 Remove the four bolts from the pinion yoke that hold the u-joint straps on. You are supposed to mark the orientation of the yoke relative to the driveshaft. Use some wire to get the driveshaft up out of the way.
AT THIS POINT, you should remove the whole axle housing by removing the brake line brackets and the suspension U-bolts. It only takes another 20 minutes, and it is worth it. You are about to have to do lots of hammering on the pinion, lots of close inspection work, careful cleaning, and moving the carrier in and out multiple times. You do not want to do this with the axle mounted on the vehicle. A couple of jack-stands on your garage floor make a nice work platform for the axle, it lets you spin it around, which you will be doing many times. It might be better to remove the axle with the quadrasteer, rotors, and hubs still attached. It is very heavy though.
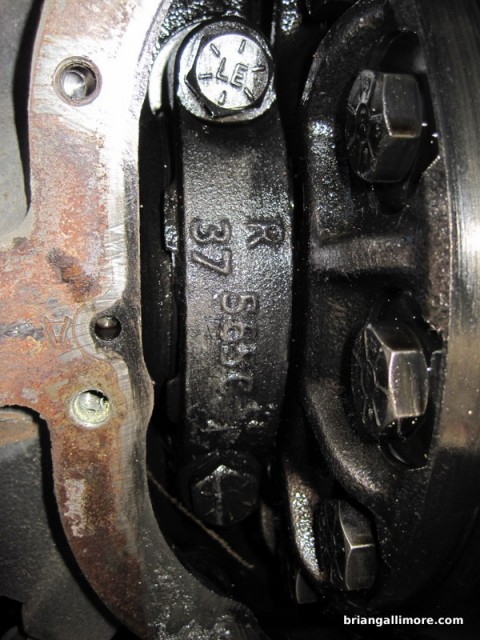 Mark the position and orientation of each bearing cap. Mine were already marked.
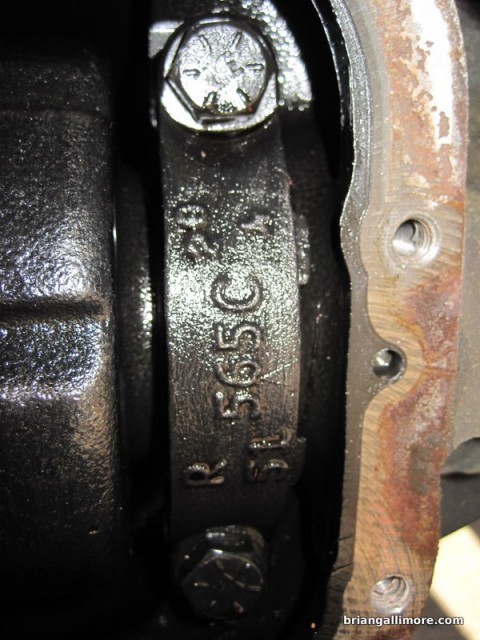 Remove the bearing cap bolts (80 lb-ft)
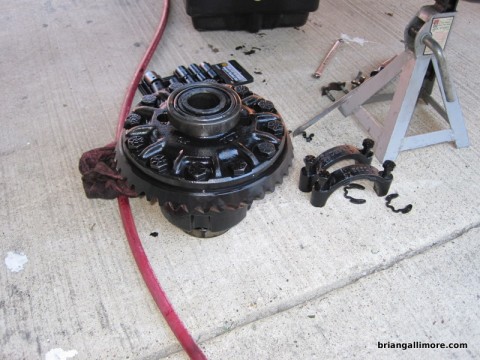 The service manual says you should use a housing spreader tool, but my carrier just fell right out when the caps were removed. You are also supposed to carefully catch the shims from each side so you know where to start when you re-install it. I had no shims. I’m guessing they were destroyed by the side-to-side play after the bearings failed.
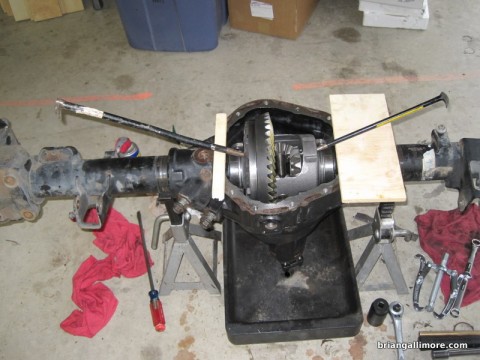 Using a couple of round pry bars with pieces of wood protecting the machined surface works really good. There are holes in the carrier that seem to be positioned just right for this method.
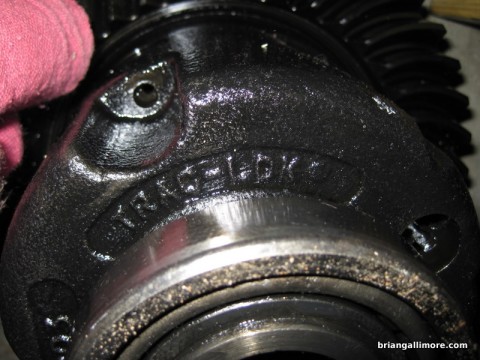 This factory carrier is a Dana Trac-Lok, but is not the same size as a standard Dana 60. It is about 3/16″ wider, so be sure you get the right part if you are going to replace it. It does take a standard ring gear, as long as it is 4.30 and down (numerically smaller). (for part numbers and more quadrasteer-specific information, see my other post about the subject)
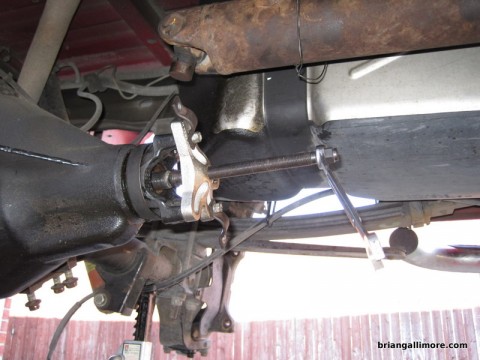 Remove the pinion nut and washer. Remove the yoke from the pinion shaft. I happened to have this tool on-hand. I used two of the bolts and the u-bolt straps as washers. It worked like a charm. If you have a 2-jaw puller, it is even easier to use than this. It is a good idea to get an extra pinion nut, so you can save one for the final assembly. The nut gets chewed up pretty quickly after all the on-off cycles.
Getting the pinion out of the housing was a bitch. You should use the specified tool (J-22536) or a big brass punch. I started by beating the pinion with a piece of wood and a sledge. I wasn’t able to swing the hammer hard enough to do much, so I I wound up beating on the pinion with the nut installed. It deformed the nut all to hell, and made it almost impossible to remove, but I managed to get it done that way. Be sure to keep and measure your old shims. The ones that will be loose on the pinion are the bearing preload shims. The shims under the inner bearing cup (outer race) are the positioning shims. I won’t try to hammer the pinion out again while the axle is under the vehicle. Get the axle out in the open on a set of jack stands so you can hammer straight down in a good position.
The outer seals come right out with no problem.
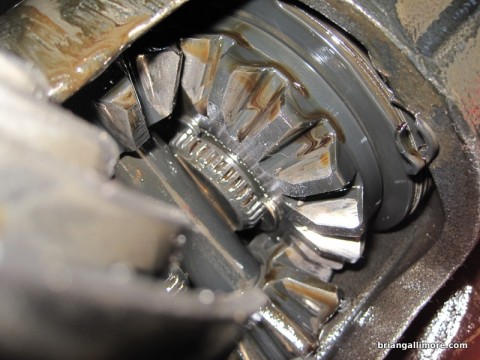
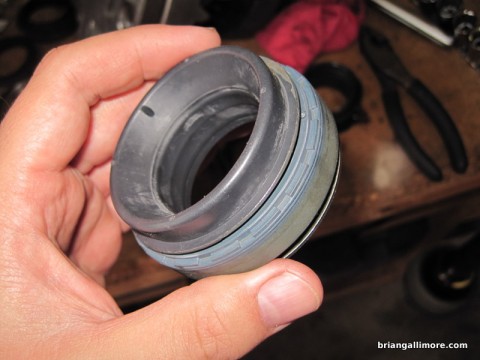
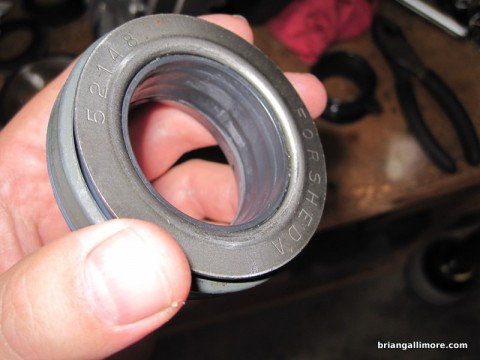
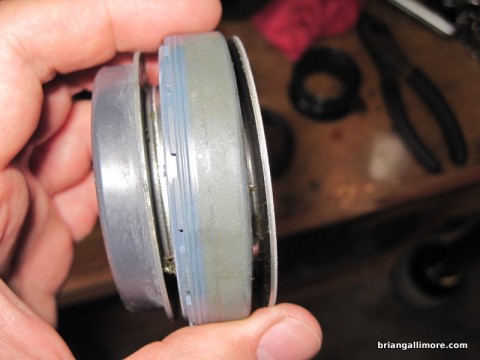
The inner seals are a two piece design. The three pictures below are of a new seal. Notice you can’t pry against the inside surface, because it is soft. The service manual calls for a special expanding seal removal tool.
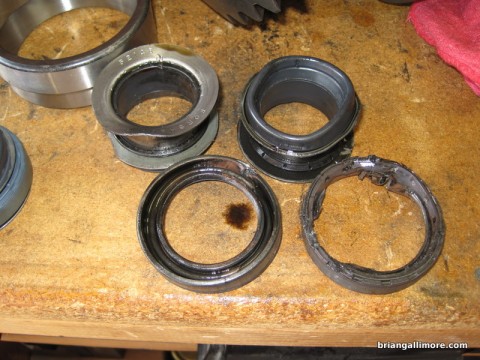
I resorted to brute-force methods of getting the seals out. After I removed them and started cleaning up the axle housing, I noticed something that was giving me hell. There is a gap between the axle tube and the pumpkin parts of the axle housing. That gap lines up with the end of the inside of the inner seals. I was placing my seal removal tools in that gap instead of the seal! As one would expect, I didn’t have much luck tearing the axle tubes loose from the pumpkin with my little seal removal tool!
Here is what my seals looked like after I abused them.
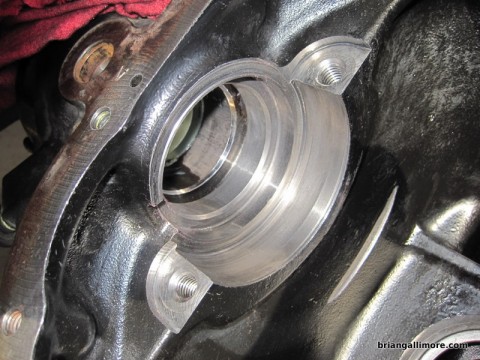
The troublesome gap can be seen in the picture below.
Remove the inner pinion bearing cup (outer race) by tapping it evenly out with a long punch. I don’t know how to do this without destroying the slinger.
I’m not going to write up how to setup the gears. I found several resources on the Internet. My favorite is Bill Vista’s write up here. His Dana 60 information page here is also very valuable.
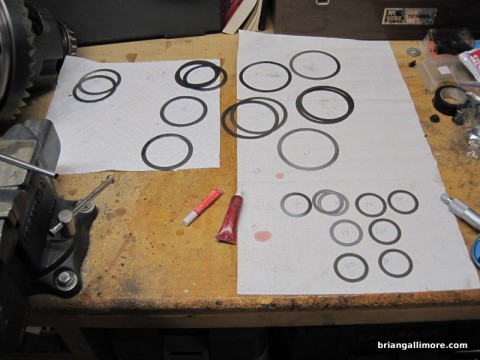
All my shims laid out and marked by size. Getting the size you want with the shim sizes available is sometimes not possible. I wound up using some of my old shims too.
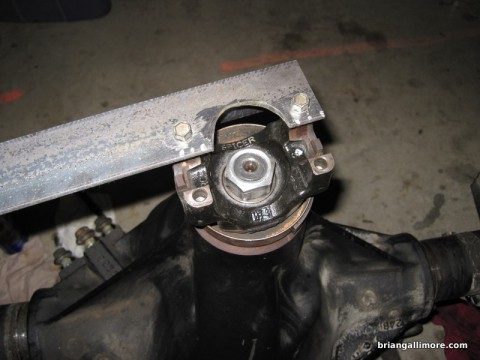
Getting the necessary 255 ft-lbs of force on the pinion nut is a real challenge. I drilled some holes in a 3 foot long piece of 3/16″ thick angle and bolted it to the yoke.
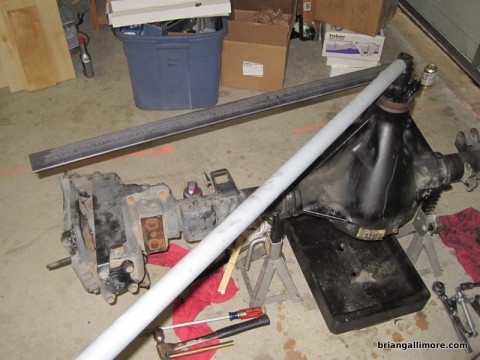
After slipping a cheater bar over my breaker, I could apply some serious torque.
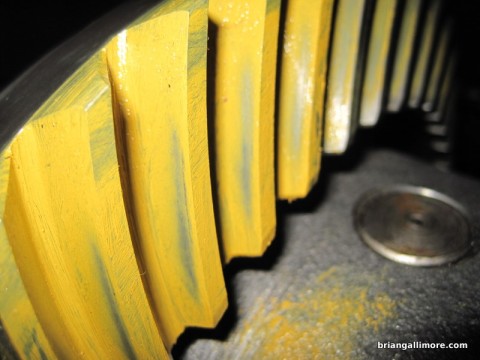
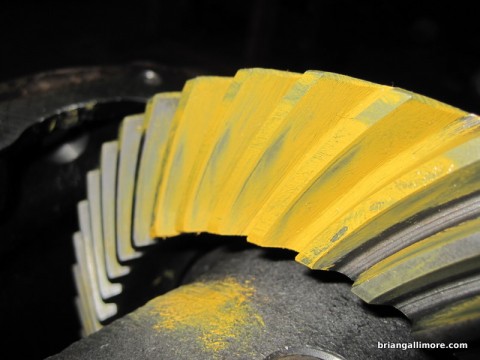
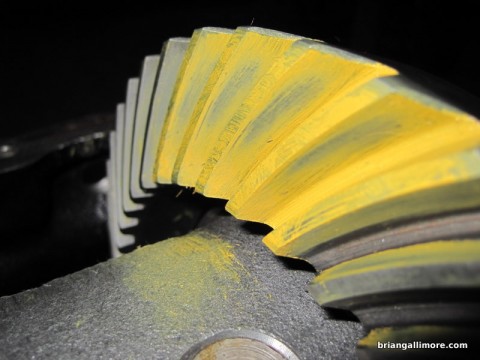
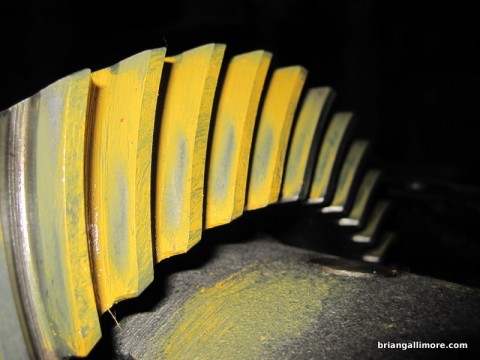
My gear pattern starting out was too close to the top of the gear tooth.
After adding 0.020″ more shims to the inner pinion bearing, the pattern moved down into the center of the tooth.



Impressive, except for the part about the yolk
huh?
In your post, you keep talking about yolk. Have you gotten chickens?
oh, I fixed it, thanks!
I think you are the only one who looks at my blog. That makes you my best customer.
This is the best info I’ve found on my rear end. You don’t really see a lot of quadrasteers around. I changed my dif fluid and pulled some big chunks out and have learned a lot, but that thing is still going. Bout to order the RIGHT parts thanks to you. Rebuild before it blows completely
I was looking for info on what to do with a smashed carrier bearing cap. I found this site and learned something new. Now if my ’99 super duty d60 came apart that easy id have it made. I fear it is toast though as the carrier really blew up breaking the outer race and tweaking the cap good.
I think the caps are critical, if they don’t fit perfectly, you have to get them remachined or start with a new housing. Let us know how it goes!
Yes they are bolted down before it is machined for the bearing race. But with careful testing and some luck another cap might work. I need bolts too though. Those two were bent as well. I was quoted 150 to 225 from a local 4×4 shop to fix it. I don’t see any housings around here for that price. Trying to get the pics posted on my website at the moment.
Just as an update, I discovered that the cheapskate I bought this axle from lied to me about what it is. Turns out to be a Dana 50 and not a 60.
oh man, I’m sorry to hear that!
do you know if the ring and pinion gear set is just a standard dana 60 ? i have a 2003 quadrasteer yukon xl with 3.73 gear ratio. I want to switch it to a 4.10 gear set. my local gear shop wanted the build code off of the right side axle tube. unfortuneatly on mine the code is not clear enough. so i am out of luck unless i just buy it from the dealer which is more than double what a US GEAR would be… also, what year was the vehicle you were working on and what gear ratio ? maybe i can just use your build code ?
Mine is a 2003 1500HD (8-lug). Originally, it had a 3.73 also, I went to a 4.30. The 3.73, 4.10, and 4.30 all use the same carrier, changes when you go to a 4.56. I used a standard ring and pinion set, and a standard rebuild kit. The only thing that is non-standard is the carrier (GM and Dana call it the case).
a little more information is here: http://blog.briangallimore.com/2010/10/quadrasteer-dana-60-axle-differences-and-similarities/
yeah, ive been looking around. i think i am gonna get the 4.30 gear ratio as well… just need to find out how to order the right one. contacting the dealer i found out the 4.10 ring gear is on back order with no plan to fill the stock orders… i think they ran out and since they no longer build these it will be discontinued… so. my only chances are to do an aftermarket gear set. but like you stated, the aftermarket vendors have no idea what gears go in these. do you know if your truck is the same rear end as my 3/4 yukon xl ??? im thinking of taking a gamble and ordering a 4.30 gear set online that is specified as a dana 60. what are your thoughts ???
When I ordered mine, I thought all quadrasteer rear-ends were ‘standard’ dana 60s, and didn’t know there was any variance between models, but I don’t know for sure if there was any differences between the different models.
I can recommend Ron at
Rons Machining Service
1-800-694-3098
http://www.ronsmachiningservice.net
he was pretty helpful and let me ship back some components I didn’t need.
Brian I have the Chevy 2500 quadrasteer and my service quadrasteer light is on do you know what would cause this and how to fix it? My upper tie rod is worn and needs to be replaced and I have checked everywhere except for the dealer and am trying to avoid going there. Is ther another part that would come off of another dana axel that will work?
The light represents several things, but it means one of the systems is malfunctioned. You need to ‘pull the code’ like you would for the service engine soon light. I don’t think the tie rod ends are standard parts, but I don’t have a good way of knowing either.
On pulling the code, dealership and a local maintenance shop could not get anything from the code when they tried reading pulling from the computer. Do you pull the code from the control modular located in the rear differential of the quadrasteer or just as you would for any other maintenance issues for the service engine components.
yes, all the systems in these trucks communicate back to the BCM (body control module). the computer reads everything from the plug under the steering wheel.
Is there a way to drain the axle fluid without taking off the cover and messing with the steering unit.
It has a drain plug on the bottom of the housing.
Thanks for responding I found that drain plug after getting back under it. I am curious about the fluid change interval . I’ve read where people are changing it every 15000 miles. I looked through the owners manual and it says at 100,000 miles. I think 15000 is excessive. Was there a supplement to the owners manual that I didn’t get ,, I bought the truck used. I sometimes get the bang noise when turning right and backing. So will probablly go ahead and change fluid as truck now has 82,000 miles..
Hey guys, The last time that I posted I mentioned that I was going to the dealer to have them check out the service quad steer light. I never made it to the dealer.
Last week I noticed one of my motor mounts were bad so I replaced the two motor mounts and the trans mount. This is not an easy job it takes about 8 hrs. After I changed the mounts my service Quad steer light has not come on. So you guys that are haveing problems with the lights coming on you might want to check out you motor mounts. I do not know if this is a coincidence or what, but the light has been on for almost a year and now it is off.
Thanks for the great info! I have a 2003 quadrasteer yukon xl 2500. I just bought a larger camper and I need to have the gears changed. It has 3.73 in it now, and there is alot of play on the pinion when the driveshaft is removed. I think this is what is causing a vibration. I figured it would be a good time to do the gear swap while this repair is done. I could not find any info as to what ratio’s would work in this, or if I could reuse my carrier with a taller ratio. So thank you for posting this. I bought this truck last april near austin, TX. I flew there from Maine and drove it home. It only had 47k miles on it. I love this truck!
I would also like to swap in 4.30 ratio , but I cannot find a 4.30 ring and pinion for the front 9.25″ gm/aam ifs axle. Any ideas? Also, are the dana 60 rear ring/pinion a standard or reverse rotation set?
Does anyone know where to get a steering unit? My rear steering is stuck all the way turned right. I work too much to mess with it so I had it towed to dealer. They are telling me that they can’t get any parts to fix it. Also I just had a tie rod put on cause of excessive slop in rear while accelerating (100 miles ago). Could they have done something wrong? Please help, I love my truck and am having a hard time accepting that a $47,000 Eight year old truck is a throw away.
Mike, I remember a few years ago when someone on e-bay was selling COMPLETE rear-ends for under $1000. I should have bought 6 of them!
Hi brian where can i get hold of therear steering rack for a sierra 2500 2004 model or even the hall differential assembly with the rack
Redjammoul@hotmail.com thank you.
I have a a steering gear for a quadrasteer it just needs a position sensor. And new tired ends.
It’s likely the tie rod job has something to do with it. Too close a coincidence to be mechanical so I’d blame the mechanic however, I doubt you will get anywhere with them. Delphi was sold (China) but still in business: http://www.nexteer.com/
Hi Brian I have an 04 Qsteer 2500 4×4 crew cab, Im told I need new inner rear hub bearing that are no longer available. GM part # 1511 5916.
Do you know of a replacement part that will work?
Sorry David, haven’t had to find one yet.
You’ll find the information you need here: http://www.gminsidenews.com/forums/f22/discontinued-parts-irreparable-60-000-truck-109321/
Tried an independent parts house or old school auto supply?
http://www.rockauto.com
David…that part number shows up at the website below. It shows as a hub. Sure you need all that just to get a bearing? There are bearing specialty businesses who can make up bearings for applications. They are experts at it so, I’d check into that rather than buy an entire assembly that includes the part you actually need, if that is the reason they suggest you need a hub part number to obtain an inner bearing.
http://www.gmpartsgiant.com/parts/gm-hub-15115916.html
Thanks Garth I think I’ll just buy the hubs found them for 200 bucks each save me the search and get the job done and thank you Brian for the blog.
I own a 2003 Chevy Silverado 1500HD w/Quadrasteer. My rear wheels have locked to the right and will not reset to 0 degrees. Towed it to the dealer and they would not do anything but pull codes. Question is, can I remove the electric motor, will the rear wheels be able to be turned (by hand) to 0 degrees once again? Like others who have posted in this blog and related blog, the dealership quoted me over $4500 in parts (with two of the parts being discontinued) and who knows how much in labor.
Trying to figure out if I just replace the motor (about a $500 part) if that will help fix my issue…
HI MI NAME IS MIGUEL ANGEL I WANT TO KNOW IF I CAN RESEAL O REPAIR AXLE SHAFT OF THE DIFFERENTIAL DANA 6O, THE SHAFT NOT HAVE NOISE BUT LEAK ,THANK IF SOMEONE HAVE SOME IDEA IF I CAN FIXE I GRATEFUL
I have 2002 gmc quadrasteer , the rearend running ok ,but only get 18000 miles I do not drive to much but the right side axle shaft leak , the dealer mechanic ,he said this shaft not can’t reseal need buy one newone. is possible that ? if the shaft no have problem, why do no repair,
some body know if the axle shaft dana 60 ,when have leak the axle shaft is possible repair , this question is the mechanic the dealer marroone Chevrolet toll mi need new shaft, I talk about quadrasteer gmc 2002 rear axle with the steering thank if someone have knowledge
Great write-up! Much appreciated by a person who has a Quadrasteer truck
I DON’T BELIVE ,IF YOU HAVE PICK UP QUADRASTEER 2002 OR 2004 ,YOU DON’T HAVE SPEAR PARTS THIS GMC OR CHEBROLET , BECUSE GM STOP , AND DISCOUNTYINUED THIS AXLE DANA QUADRASTEER. IN THIS MOMENT THE AXLE SHAFT IN NY PICK UP IS OK ,ONLY THE CV JOINT BOOT HAVE CRACK ,SO THE GRASE GO OUT , THIS SHAFT IF YOU HAVE THE SAME PROBLEM YOU NOT FOUND THE SHAFT AND THE BOOT BECAUSE IF THE CV JOINT BOOT NO GOOD NEED BUY USED PARTS IF YOU HAVE GOOD LOOK THANK
i have a 02 quadrarteer i am going to put a reg. axle in and sell mine the controle box dont work they think every thing els is fine if your looking for the rear end let me know thanks 701-520-3965
Can the quadsteer motor (part# 26091591) be replaced by undoing the two bolts, pulling it out with wire harness attached and reversing the steps with a new one?
I’m wanting to find out if there is a conversion kit to turn a quadrasteer into a solid axle. If not where did you get the rebuild kit? I’m just finding parts for a regular Dana 60
Brian,
I have a 2005 Chevy Silverado LT HD 1500 Quadrasteer and was wondering if you could get a new steering gear actuator or differential housing if necessary? Are any of these parts available through Chevrolet or elsewhere? Those seem like the two most bastard parts on this rear end.
Hi Brian,
You’re a wealth of information about these rare trucks that seemingly no one knows anything about. A couple questions:
1 – I’m interested in a mild suspension lift and a bigger tire. Can you raise the rear via blocks or add-a-leafs? Have you done it? Would you recommend it or not?
2 – In your opinion, what is the biggest tire you would run on a Q-steer? Obviously I want to preserve the steering system, and don’t want to put any significant additional stress on it.
3 – If something does go bad, do you have a resource for parts for the rear steering system?
Any info would help. Thanks for your time.
Hi Brian,
Great write up. My pinion seal looks like it has gone on my 9.75″ quadrasteer 1500 rear end. I have ordered the new pinion seal: Part# 26094851 and 3L of fluid #88862624 75W-90 gear oil. (Old fluid part number #12378557) I am wondering if I need any special tools to change the seal? Also do you have any tips on doing this?
Thanks,
Devan
Devan, my pinion seal went out shortly after I did this work. It was pretty easy to replace with the axle still in place. Hardest part is getting that huge nut off and re-torqued.
Hi Brian,
This is just a repeat from my post last Sept. You’re a wealth of information about these rare trucks that seemingly no one knows anything about. A couple questions:
1 – I’m interested in a mild suspension lift and a bigger tire. Can you raise the rear via blocks or add-a-leafs? Have you done it? Would you recommend it or not?
2 – In your opinion, what is the biggest tire you would run on a Q-steer? Obviously I want to preserve the steering system, and don’t want to put any significant additional stress on it.
3 – If something does go bad, do you have a resource for parts for the rear steering system?
Any info would help. Thanks for your time.
– Jason
Jason, I’ve seen plenty of old solid axle Blazers and such raised only using blocks. The problem is you add more twist to the axle when you brake or accelerate. (makes it handle worse) I haven’t done it.
I don’t have any good answers for your other questions, sorry!
I have to agree. Suspension alterations or lifting frame and body weights upward of their design completely alter the engineering efforts. Just a change of tire sizes make a vehicle handle completely different and changes the entire stress numbers which then will likely involve higher maintenance and replacement cycles of wear items. Might just be better to dedicate a lifted truck to off road only and keep a stock one for road uses. Been there, done that.
Yes you can lift it 3-4 inches Max tire 34″ (315 75 16r) See my reply/ coment Mar 31 DPH
on Brians Blog.
Jason I keep replying to the wrong guy! Yes you can lift it no problem. See my post below
DPH
Brian, this is a wealth of information on the Q-steer system. I have a 2003 GMC Sierra with 124,000 miles and the system failed back in January. I’m told by the GM dealership that problem is the Rear Steering Position Sensor, which has failed. Unfortunately, the replacement part is no longer available anywhere. Currently, the truck cannot be safely driven since the steering wheel is off-center by nearly 90 degrees ccw. The rear tires are not straight with the body. Thus the truck crabs down the road. The dealership does not know how to get the rear steering back to the neutral position so the truck can be driven in 2 wheel steer with all wheels properly aligned with the body. Multiple calls to GM for assistance have been useless. Do you have any idea how to get the wheels and steering wheel back to alignment so I can at least drive the truck?
Any information would be appreciated.
Jerry J.
I Lifted my 04 1500 HD with “Full Traction” 3″ lift, 315 75 16r (34″) used Fab Tech shock towers to keep stock selectable shocks, changed oil every 50K miles (Clunks when you back up if you don’t) Pull 8000# trailer No problems other than rear wheel bearing. Still running strong GMC
I HAVE A 2003 Q STEER SAME CLUNK IN THE REAR MINE IS 6 LUG I FOUND THE HUBS AND HAVE REPLACED THEM BUT AM HAVING TROUBLE FINDING THE REAR END PARTS
I have a 2004 SIERRA 2500 Quadrasteer with 4.11 gears. I only have 55,000 miles on it ,I just changed the rear lube and used Amsoil Full Syn. 75/90 just under 3 quarts. Problem two metal pieces (your picture bridge of C clips) and two metal pieces about 1/2 inch long curved like 1/2 copper pipe, steel ? any ideas? 6.0 LQ4 4L80E WHIPPLE 2.3 @16 lbs boost, meth injection, 777 tq @ 3500 & 744 hp @ 5900 rear wheel. What do I need to rebuild posi, clutches/steels C clips gaskets. Bought truck new
Brian, do you know of anyone who has attempted swapping Quadra steer for a standard axle. I have a 2003 Denali extended cab that’s in excellent shape.. I’m thinking about attempting the swap, but there is nothing on the Internet of anyone completing the task. Thoughts?.
Thanks a million for this blog! I couldn’t find the parts I needed until I saw this. I never take my stuff to shops, but I did this time. They totally screwed up my carrier, and I had to get a new one. Took me two years. Found it, because of you, and I’m about to do this install. Much appreciated as I do not want to give up my Quadrasteer unicorn lol Again, thanks so much!!